
| File 316.1 | How to Use the F1000 & the Fire Reporting Process |
Updated 5/23/2008 |
Status Values |
State of Report |
Emailed |
New |
Report started but never saved |
|
Created |
Report saved at least once |
|
Prepared |
Preparer is done, passed integrity checks |
Email sent to Primary Reviewer |
Reviewed |
Reviewer is done, passed integrity checks |
Email sent to Primary Approver |
Approved |
Approver is done, passed integrity checks |
Email sent to |
When |
Menu Options Available |
Actions Available |
New - Initially creating a fire report |
Print Save Prepare |
Report initially created by |
Created |
Print Save Delete Prepare |
Preparer can edit |
Creator after hit “Prepared” |
Can’t edit the report anymore |
|
Reviewer |
Print Save Delete Review |
Reviewer can edit |
Reviewer after hit “Reviewed” |
Can’t edit the report anymore |
|
Approver |
Print Save Delete Approve |
Approver can edit |
Approver after hit “Approved” |
Can’t edit the report anymore |
The Primary Reviewers and the Primary Approvers receive an email when they have reports to look at.
There is also a person designated at each unit to receive an email when the Approver successfully hits approve, telling them to assemble the hard copy. The hard copy is then given to the reviewer and approver to sign and sent on to the FAMB with the narrative and any other supplemental documents
When you click on “Prepared” this initiates error checking. If errors for incomplete information were found, you will get an orange bar at the time with a list of the errors. Fix the errors and click on “Prepared” again. When “Prepared” is successful, you will get a green bar with:

I just clicked on “Prepare” and there were no errors. This shows that I also have the rights to “review” this file. If you are a backup reviewer, stop here and let the Primary Reviewer review the fire report. After your approval level has been reached the only command for this report for you is “Print” and you can no longer edit the report.
At any level if there is an incomplete or inaccurate report you will get an error message telling you what to fix. Fix the problem and click on the appropriate approval button again.

The Fire Unit will create, prepare and review the onlne F1000 and submit the electronic F1000 to the Land Office within one week of declaring the fire out or within one week of entering patrol status. Notify either the "approver" if report is not approved yet or the Information Systems Technician at the Fire & Aviation Management Bureau with the declared out date later.
The Land Office will “approve” their online F1000 fire report within one week of receiving the “reviewed” email.
The hard copy report must be signed by either the reviewer or the approver as the land office fire manager designates. The hard copy original report and a hard copy of all supplementals will be sent within one week of receiving the final “approval” email to the Fire Management Bureau business coordinator (currently the FAMB Administrative Assistant). Keep a copy of the hard copy F1000 and supplementals at the unit. These hard copies must be kept for 10 years, according to the Fire Management Bureau Retention Schedule.
The original F-1000 and all supplemental forms are maintained at DNRC’s Fire and Aviation Management Bureau.
The Units and / or Land Offices should keep complete copies for ten years.
The documentation for fires that use a Type I or II team is:
The document manager in the online fire report application now allows the preparer to attach electronically all supporting documentation. Also print and attach the the supporting documentation to the F1000 hard copy report. The rest of the fire documentation package will remain at the unit.
Copies of fire reports and any supporting documentation (excluding the documentation for Type I and Type II incidents) should be kept at the units and at the land offices for ten years.
Start your Internet browser.
The new program is accessed on the Internet via this link:
It can also be accessed by logging into Mine. Then go to "My Intranets" and open the "Natural Resources & Conservation". Then go to "Employee Tools", "F1000".
If when you start your computer, you are automatically logging in to the State Domain, then the F1000 Fire reports program will let you in directly. If when you start Outlook, you are automatically in it, then this is you.
If you are not automatically logging into the Domain, you will get a pop-up box similar to logging in to Outlook:
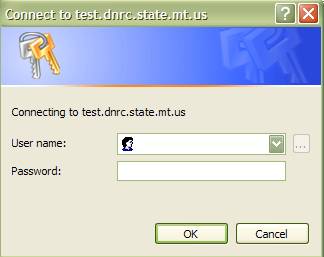
Type as your User name: State\coXXXX, where XXXX is your CO number. Then enter your Outlook password.
The first screen will be a worksheet view of all the fires for your area, unit or land office for the current fire year. This is the “Home” page. The first time of course, the list will be blank. You will also notice that your highest “approval status” is shown. If you are normally a preparer and are also a backup reviewer, “reviewer” will show. Just don’t review the reports unless your primary reviewer is unavailable.
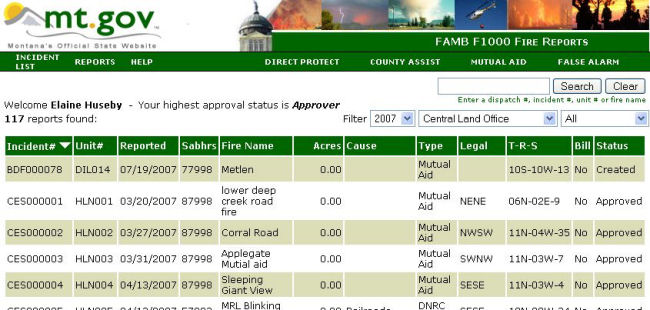
All of the search and filters apply and will persist, meaning that if you open fire reports or run statisical reports, when you return to the incident list - whatever filters or searches you specified will still apply. For instance, you could choose "not approved" reports and put "m" in the search and you would get a list of all fire reports that are not approves and whose firenames begin with the letter "m".
You can search the incident list by all or part of a dispatch #, incident #, unit number or the firename.
The fires are normally sorted by Incident#. You can click on any Incident List field label and sort, in ascending order the reports by that field.
You can filter the reports that you see on the worksheet screen by the status. Filter values are:
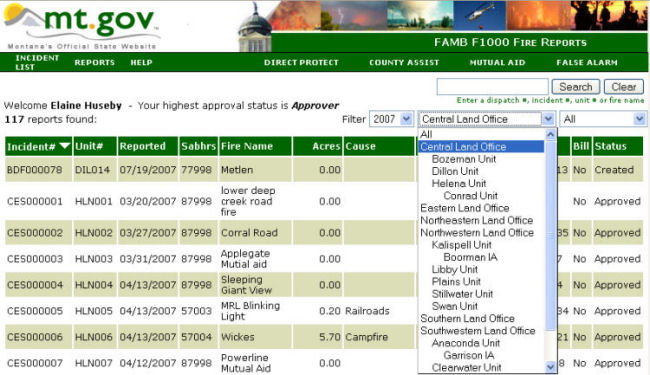
You can view any part of the DNRC F1000 report list by any area, all, land office or unit. You only have write access to the office area you have been designated as, but you can view all of the fire reports.
The “Download” command button downloads a CSV file for everything showing on the incident list for the year chosen. If you have filters on, the download will be of the filtered incidents. If you open a csv file in Excel, you can save it as an xls file or as a dbf file. Then the downloaded fire reports can then be imported into Microsoft Access or Lotus Approach to do your year-end reports.
Saving information on the "cause" saves a number code (1 – 10) into the field, “cause” , There is a description for this: the text “Lightning”. For the download to CSV file function, both the integer codes and the text description will be downloaded as "cause" and "cause_name".
The fields that are downloaded in the "typical" download are defined in the typical data dictionary.
You can start entering reports by clicking on the fire type in the header Menu:

When filling in the fire report, you can and should click on “save” often. The report will be saved with status “Created”.
Each of the labels is a “Help” link for that field and will bring you into the "Help" file at that fields' location.
You can use the mouse or tab to it and type the first letter of the selection you want and then use the down or up arrows to go to your choice.
Hint for quickly selecting from a drop-down list:
For example, to select a “county” you may type the first letter of the county to bring yourself to the start of that section in the list. Typing ‘m’ will bring you to the first county that begins with m, which is Madison. Then you can use the down arrow key to get to Meagher to pick the county. Hitting the tab key will complete the field. This quick access method works for selecting in any drop-down list.
If you are going on a fire, for instance , and you are either a Primary Reviewer or a Primary Approver, you will want to forward all the F1000 email messages you receive to your backup. You must create a rule in Microsoft Outlook and simply turn it on when you are leaving on fire assignment.
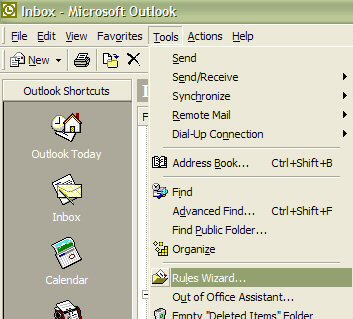 Open the Rules Wizard under Tool |
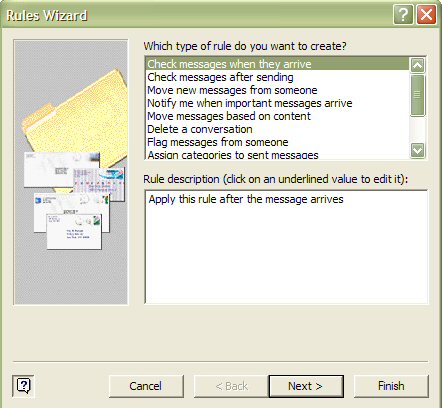 Select "Check messages when they arrive" and click "next". |
|
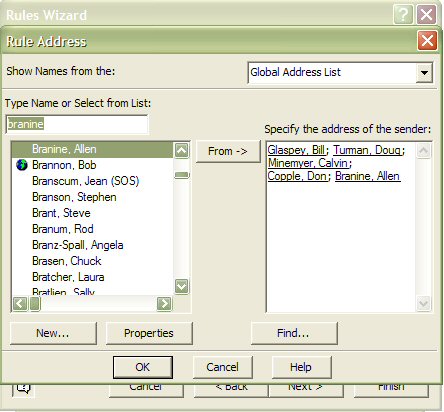 Select all the people who might send you this F1000 email for your approval. In this case, the approver is Wally Bennet and he is making a rule to forward his F1000 approver emails. He might receive emails from all the Primary Reviewers (Unit Fire Sups) or all the Backup Reviewers (which I didn't put in list). |
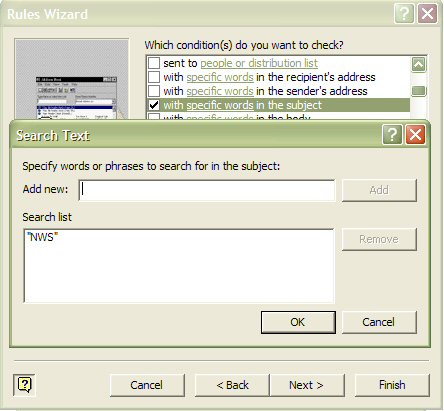 2nd condition is to look for specific words in the email subject. For Wally, it would be "NWS". Click OK. |
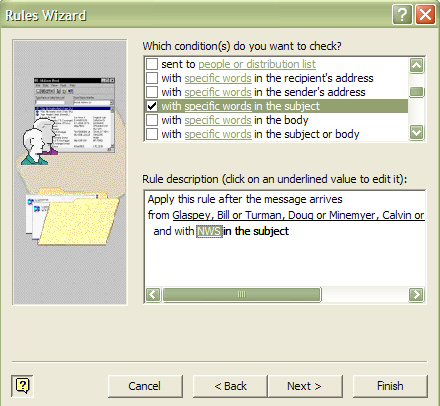 This shows both conditions, forward emails from any of these people where "NWS" is in the subject. Click "next". |
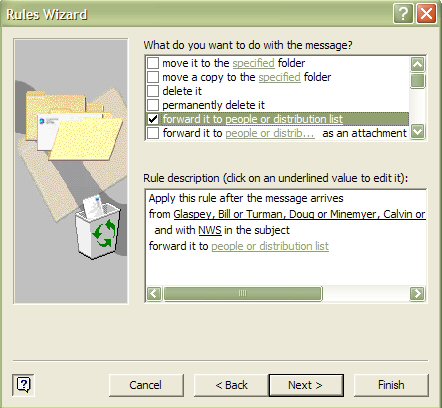 In this case Wally wants to forward the email to his backup approver. Check "forward to people or distribution list" and click on "people or distribution list" to add Dan Cassidy. |
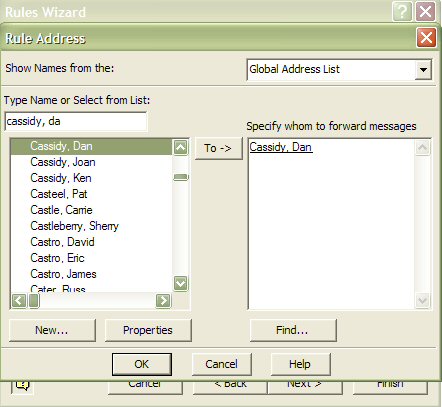 Select Dan Cassidy and click on "OK". |
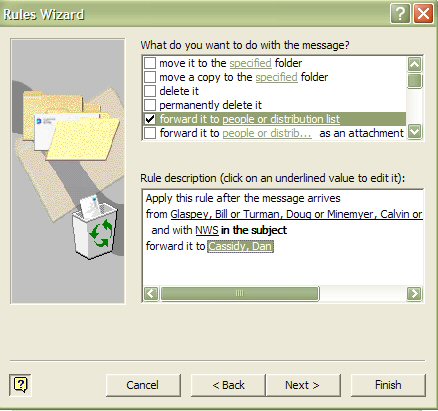 Click "next". |
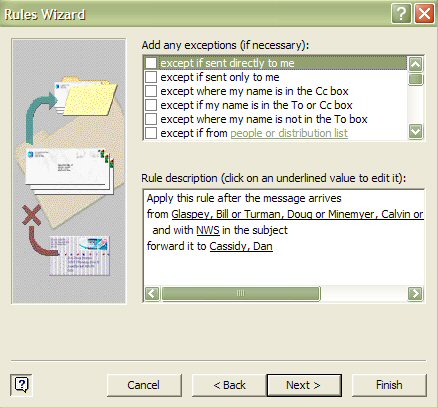 Click "next", there are no exceptions. |
Type in a name for this rule: "Forward F1000 Approval Msgs". Click "next". |
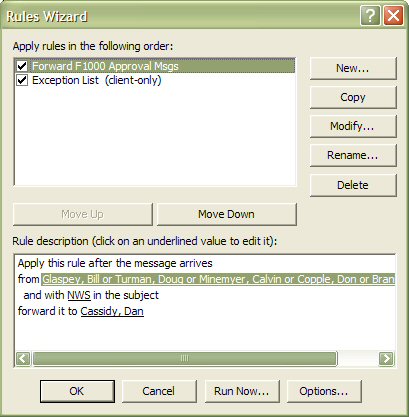 The rule is created. Now you can uncheck the rule "Forward F1000 Approval Msgs". To turn the rule on later, simply go into Tools, Rules Wizard and check this rule. You are done. |